Showing posts with label SSIS. Show all posts

2019-03-19

Handling Long File Name in Windows

Let's make the question short: on Windows platform, how can you copy the file if the path is too long?

This question is coming from a project I worked on recently. What happened is that quite a few Access Databases are dumped to a network shared folder, and we need to move them to a staging folder for data process. Because the access database is dumped automatically by a 3rd party software, some access databases were saved in an invalid file path (more than 260 characters in file's full name).

The solution is simple: RoboCopy. It is a standard component in Windows now and you can find an explanation of it here. So basically what we need to do, is listing all files from the source folder by time stamp, and then calling the RoboCopy to copy the file. Procedure is simple but just a few things need to have a look:

1. The FileInfo class acts differently by Windows platform
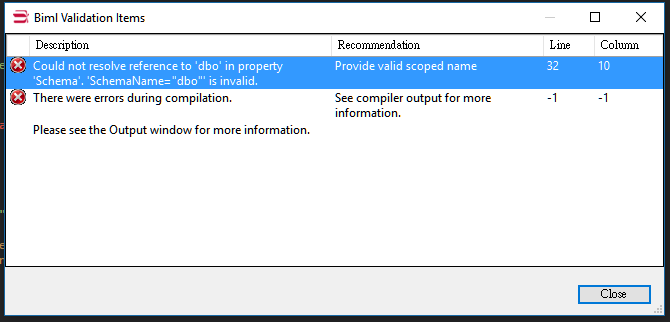
The SSIS package was built on Windows 7 platform (yes, 2019 already I know, but you won't believe how old client's infrastructure is.). On Windows 7 when calling FileInfo's full file name, there will be an IO.PathTooLongException. As demonstrated below, in the try catch block we extract file's name and path if the file's full name is too long, and then construct file's full name and pass it to RoboCopy.


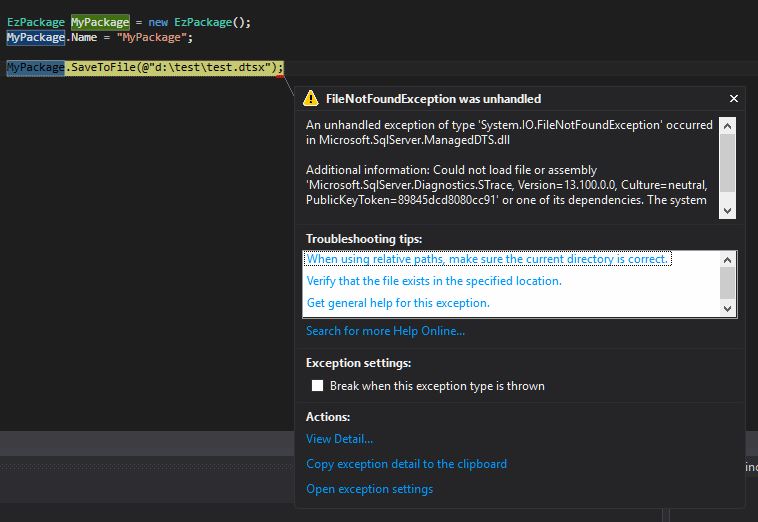
So far so good, but the SSIS package eventually would be triggered on Windows 2012 platform. When we tested the package, the FileInfo's FullName actually returned the full path of the file, and the exception occurred at the directory level, which left us an unhandled exception: So files supposed to raise IO.PathTooLongException were passed to SSIS's File System Task, and obviously, SSIS's File System Task cannot handle File Name Too Long error.


Fixing the error is easy, but it is a good lesson: keeping dev and prod environment identical is critical.

2. RoboCopy can have more than one return code to represent success result.
When calling SSIS's Execute Process Task, only one return code is accepted by default, e.g. 0 by default is treated as success value, return code other than 0 will be treated as failure.

But when you look at RoboCopy's document, you can see RoboCopy's return code is a bitmap. In my situation, we need to set more than one return codes for success value.

We can easily fix this problem by following steps below:

In the Execute Process Task Configuration windows, change FailTaskIfReturnCodeIsNotSuccessValue to False. By setting it to false, Execute Process Task will always report success.


Now keep Execute Process Task selected and go to the Properties window (locate at the bottom-right corner by default, press Ctrl + W then P if you cannot find it), assign a package variable to ExecValueVariable. It will capture the execute result to the variable.


Now you can figure it out, instead of letting Execute Process Task report success or failure, we capture execution result to a variable, then in the Precedent Constraint we can use expression to identify the actual outcome of the RoboCopy.

That is today's post, good experience to find and fix these issues though at the beginning the task was looked so simple.


2017-11-28

API Response Pagination - SSIS

In my previous posts, I demonstrated how to paginate API response in Power Query. But what if we need to do a pagination via SSIS? As far as I know, at this stage there is no generic Rest connector available in SSIS. Therefore, we have to use script component/task to read response from the Rest API.

To show you the approach in a quick way, let's write some codes to replicate the scenario I demonstrated in this post. Firstly I created below function:

private static string callAPI(HttpClient client, string key, string endPoint)
    {
        string jsonBody;

        var header = new MediaTypeWithQualityHeaderValue("application/json");
        client.DefaultRequestHeaders.Accept.Add(header);

        client.DefaultRequestHeaders.Authorization = new AuthenticationHeaderValue("Key", key);

        HttpResponseMessage response = client.GetAsync(endPoint).Result;

        jsonBody = response.Content.ReadAsStringAsync().Result;

        return jsonBody;
    }


Clearly, this function will extract response body from the Rest API (here we assume the API uses HTTP header "Key" for authorization purpose).

So now we have the base method to call the API, what we need to do is creating a recursive routine, so that we can read the next page until nothing returns:

            bool tryNextPage = true;

            using (HttpClient client = new HttpClient())
            {
                while (tryNextPage)
                {
                    string jBody = callAPI(client, key, endPoint);

                    if (jBody.Length > 50)
                    {
                        ResponseBuffer.AddRow();
                        ResponseBuffer.JsonBody.AddBlobData(System.Text.Encoding.UTF8.GetBytes(jBody));

                        int page = int.Parse(endPoint.Substring(endPoint.Length - 1, 1));
                        
                        endPoint = endPoint.Substring(0, endPoint.Length - 1) + (page + incremental).ToString();
                    }
                    else
                    {
                        tryNextPage = false;
                    }
                    
                }

                
            }


As you can see, I defined a Boolean variable to control the While loop. And in each loop, I read length of the Json response to determine if we should read next page.

Simple approach, isn't it? Though it looks like we have to write more lines of code when compare to power query, SSIS does have its own advantages, such as data quality control. Until my next post, enjoy the pagination.

2017-05-06

Create SSIS Package in Code Part 3 - BIML

This is the 3rd, and the last post of the topic "Create SSIS package in Code". The other two posts about this topic can be found via the links below:

So today's topic is creating SSIS package via BIML. BIML, stands for Business Intelligence Markup Language,  is an extremely powerful tool can help you prepare and standardize your ETL project. Just in case you haven't heard of it, you can find everything about BIML at BIMLScript site. Just like previous two posts, I am going to demonstrate how easily we can create identical package (a Data Flow Task, flat file connection, and OLE DB connection) in BIML today.

Creating BIML for SSIS package is a bit different to our previous projects, in which we did C# code in a C# console program. To create a BIML file, we do our task in Visual Studio Business Intelligence project.

So first of first, we need to have BIMLExpress installed in our development environment. Then in your Visual Studio IDE you should be able to add BIML file into your project via the menu item:


Alternatively, you can add a BIML file into the project through the context menu.


After we have BIML file added into the project, we can start to write BIML components. To save your time, here is what I wrote:

<biml xmlns="http://schemas.varigence.com/biml.xsd">
    
    <connections>
        <flatfileconnection fileformat="myBIMLFlatFileFormat" filepath="D:\test\test.txt" name="myBIMLFltCon"></flatfileconnection>
        <oledbconnection connectionstring="Data Source=CHI\SS2016;Initial Catalog=Staging;Provider=SQLNCLI11.1;Integrated Security=SSPI" name="myBIMLOleCon"></oledbconnection> 
    </connections>
        
    <fileformats>
        <flatfileformat codepage="1252" columnnamesinfirstdatarow="true" flatfiletype="Delimited" headerrowdelimiter="|" isunicode="false" name="myBIMLFlatFileFormat" textqualifer="None">
            <columns>
                <column columntype="Delimited" datatype="AnsiString" delimiter="|" length="255" name="FirstName"></column>
                <column columntype="Delimited" datatype="AnsiString" delimiter="|" length="255" name="LastName"></column>
                <column columntype="Delimited" datatype="AnsiString" delimiter="|" length="100" name="Suburb"></column>
                <column columntype="Delimited" datatype="AnsiString" delimiter="|" length="3" name="State"></column>
                <column columntype="Delimited" datatype="AnsiString" delimiter="CRLF" length="4" name="Postcode"></column>
            </columns>
            
        </flatfileformat>
    </fileformats>
        
    <databases>
        <database connectionname="myBIMLOleCon" name="BIMLStaging"></database>
    </databases>
    
    <schemas>
        <schema databasename="BIMLStaging" name="BIMLSchema"></schema>
    </schemas>
    
    <tables>
        <columns>
                <column datatype="AnsiString" length="255" name="FirstName"></column>
                <column datatype="AnsiString" length="255" name="LastName"></column>
                <column datatype="AnsiString" length="100" name="Suburb"></column>
                <column datatype="AnsiString" length="3" name="State"></column>
                <column datatype="AnsiString" length="4" name="Postcode"></column>
            </columns><table name="customer" schemaname="BIMLStaging.BIMLSchema">
            
        </table>
</tables>
        
    
    <packages>
        <package name="myBIMLPackage" protectionlevel="EncryptSensitiveWithUserKey">
            <tasks>
                <dataflow name="myBIMLDFT">
                    <transformations>
                        <flatfilesource connectionname="myBIMLFltCon" name="myBIMLFltSrc"></flatfilesource>
                        <oledbdestination connectionname="myBIMLOleCon" name="myBIMLOLEDest">
                            <inputpath outputpathname="myBIMLFltSrc.Output"></inputpath>
                            <externaltableoutput table="customer"></externaltableoutput>
                        </oledbdestination>     
                    </transformations>
                </dataflow>
            </tasks>
        </package>
    </packages>
    
</biml>


Once we complete the coding task, we can simply right click the BIML file, and then press "Generate SSIS Package".


Now a new package is generated in our Business Intelligence project (myBIMLPackage). Open the package and run the package, we got the execution result right away.


Obviously, BIML is much simpler than other approaches. It hides the complicated mapping routines for you when you are designing your package. Within the Business Intelligence project, you can add BIML script file as a standard template and then generate packages in one batch. Additionally, BIML express provides quite a lot handy functions to improve your productivity, such as BIML script validation. So I strongly recommend this approach when you are working in ETL project.


Here is the end of the series "Create SSIS package in Code". Before my next post, enjoy it. :)


2017-04-24

Create SSIS Package in Code Part 2 - EzAPI

This is the 2nd post of the topic "Create SSIS package in Code". The full list of the posts about this topic can be found via the links below:
Today let's look at the option of EzAPI. Basically EzAPI is a set of classes designed to simplify and automate the process of creating SSIS packages. You can find its details and documentations at CodePlex, or just in case at the time you read this post CodePlex has been shut down, you can find it on the nuget.

Before I show you the steps of creating a package via EzAPI, you may or may not face this error when you try to save the package:  

An unhandled exception of type 'System.IO.FileNotFoundException' occurred in Microsoft.SqlServer.ManagedDTS.dll

Additional information: Could not load file or assembly 'Microsoft.SqlServer.Diagnostics.STrace, Version=13.100.0.0, Culture=neutral, PublicKeyToken=(your machine based value)' or one of its dependencies. The system cannot find the file specified.


To my understanding it is a reference error, that when the API tries to call its dependency, it cannot find the correct path. To fix the problem, we can manually add the reference. In my case, I move to the system folder "C:\Windows\assembly", search and find correct STrace.dll location (version 13.100.0.0), and then add it into the project reference.


Now if we call the SaveToFile method again, the error has gone.


OK, it is time for the EzAPI. Generally, creating package via EzAPI is much simpler than the pure C# way. Because many SSIS objects have been wrapped and simplified in EzAPI. Below code did the identical thing to my first example: import some records from a flat file into database table, but in a relatively simple way.


        static void Main(string[] args)
        {

            string fltFilePath = @"d:\test\test.txt";
            string pkgPath = @"d:\test\myEzAPIPackage.dtsx";

            EzPackage MyPackage = new EzPackage();
            MyPackage.Name = "myEzAPIPackage";

            //flat file connection manager
            EzFlatFileCM fltFileCM = new EzFlatFileCM(MyPackage);
            fltFileCM.ConnectionString = fltFilePath;
            fltFileCM.ColumnNamesInFirstDataRow = true;

            //similar to the pure C# example
            //we hard code column metadata
            #region columns
            IDTSConnectionManagerFlatFileColumn100 colFirstName = fltFileCM.Columns.Add();
            colFirstName.ColumnType = "Delimited";
            colFirstName.ColumnDelimiter = "|";
            colFirstName.DataType = DataType.DT_STR;
            colFirstName.ColumnWidth = 255;
            ((IDTSName100)colFirstName).Name = "FirstName";


            IDTSConnectionManagerFlatFileColumn100 colLastName = fltFileCM.Columns.Add();
            colLastName.ColumnType = "Delimited";
            colLastName.ColumnDelimiter = "|";
            colLastName.DataType = DataType.DT_STR;
            colLastName.ColumnWidth = 255;
            ((IDTSName100)colLastName).Name = "LastName";

            IDTSConnectionManagerFlatFileColumn100 colSuburb = fltFileCM.Columns.Add();
            colSuburb.ColumnType = "Delimited";
            colSuburb.ColumnDelimiter = "|";
            colSuburb.DataType = DataType.DT_STR;
            colSuburb.ColumnWidth = 100;
            ((IDTSName100)colSuburb).Name = "Suburb";

            IDTSConnectionManagerFlatFileColumn100 colState = fltFileCM.Columns.Add();
            colState.ColumnType = "Delimited";
            colState.ColumnDelimiter = "|";
            colState.DataType = DataType.DT_STR;
            colState.ColumnWidth = 3;
            ((IDTSName100)colState).Name = "State";


            IDTSConnectionManagerFlatFileColumn100 colPostcode = fltFileCM.Columns.Add();
            colPostcode.ColumnType = "Delimited";
            colPostcode.ColumnDelimiter = Environment.NewLine; //this is the last column, so the delimiter needs to be set as new line
            colPostcode.DataType = DataType.DT_STR;
            colPostcode.ColumnWidth = 4;
            ((IDTSName100)colPostcode).Name = "Postcode";

            #endregion

            //ole db connection manager
            EzOleDbConnectionManager oleDBCM = new EzOleDbConnectionManager(MyPackage);
            oleDBCM.ConnectionString = "Data Source = CHI\\SS2016;Provider=SQLNCLI11.1;Initial Catalog = Staging;Integrated Security = SSPI;";
            oleDBCM.Name = "my OLE Connection Manager";

            //data flow task
            EzDataFlow dft = new EzDataFlow(MyPackage);
            dft.Name = "dft EzAPI";

            EzFlatFileSource fltSrc = new EzFlatFileSource(dft);
            fltSrc.Connection = fltFileCM;
            fltSrc.ReinitializeMetaData();

            EzOleDbDestination oleDest = new EzOleDbDestination(dft);
            oleDest.Connection = oleDBCM;
            oleDest.AttachTo(fltSrc);
            oleDest.Table = "Customer";
            

            MyPackage.SaveToFile(pkgPath);

            Console.WriteLine("created successfully");
            Console.ReadLine();

        }


From this code list, we can see EzAPI simplifies the pipeline management, so that we do not need to spend time on adapter coding. However, for the connection managers we still need to define their metadata, and especially when we need to assign flat file source into the data flow task, we need to refresh the metadata by calling ReinitializeMetadata() method.

Now run the program by press F5, the myEzAPIPackage should be generated in your D:\test folder. Open the package in design mode and run it:


So this is the end of this post. In my next post, I will introduce the 3rd way to create the SSIS package dynamically. Before that, enjoy the code. 

2017-03-21

Create SSIS Package in Code Part 1 - Pure C#

A quick question: if you are an ETL specialist, how many times do you need to repeat your SSIS design task? Myself, 80% of my SSIS time is to move a set of data from place A to place B.

So if you haven't known these sort of things, I am going to introduce three ways to build package dynamically:

Today let's focus on pure C# code, it is a bit crazy, so I will never ever suggest anyone to create SSIS packages through this way. But knowing the way how the package is created can give you some understanding when you are looking at EzAPI and BIML. So let's start today's topic.

All I am going to do, is to create a SSIS package in C#, which will load a text file into a table. Below is the T-SQL script to create the dummy table:

use Staging
go

if exists(select 1 from sys.tables where name = 'Customer')
begin
 drop table Customer
end
go

Create table Customer
(
CustomerKey int identity(1,1),
FirstName varchar(255),
LastName varchar(255),
Suburb varchar(100),
State varchar(3),
Postcode varchar(4),
CreatedAt datetime default(getdate())
)
go

insert into Customer (FirstName, LastName, Suburb, State, Postcode)
values
('Chi', 'Qi', 'Richmond', 'VIC', '3121'),
('John', 'Smith', 'Melbourne', 'VIC', '3000')
go

select * from Customer

And the data flow task is as simple as screenshot shows below:


The flat file used in this example is a very simple text file:


To have the package created from C# code directly, I have a C# console project created, then add below references:

Usually you can find these dll files at C:\Program Files (x86)\Microsoft SQL Server\<your SQL Server version>\SDK\Assemblies. Just remember put correct version into the place holder (2016: 130; 2014: 120, 2012: 110, etc.).

Now following the standard way, I add a few using clauses

using Microsoft.SqlServer.Dts.Runtime;
using Microsoft.SqlServer.Dts.Pipeline.Wrapper;
using RunTimeWrapper = Microsoft.SqlServer.Dts.Runtime.Wrapper; 


Now here is a general overview of the steps I am going to do:

  1. create a flat file connection manager for the source; 
  2. create flat file connection in the flat file connection manager;
  3. create column metadata within the flat file connection;
  4. create an OLE DB connection manager for the destination;
  5. create a data flow task in the package;
  6. create the flat file source within the data flow task;
  7. create the OLE DB destination within the data flow task;
  8. create a path between flat file source and OLE DB destination;
  9. map the columns between input and output;
  10. save the package;
  11. execute it!
And after executing the code (package), the staging.dbo.customer table should have dummy customer records from the text file:


I am not going to explain my code line by line - you can find all of them at the end of this post. But there are a few things you might want to know:

  • the connection manager is identified by its name. To have a full list of connection managers, you can all of them at MSDN 
  • the data flow task is identified by its name as well. But when adding them, keep in mind you need to prefix them with "STOCK:". List of the SSIS tasks can be found at here
  • The difficult part is finding correct ComponentClassID for the source and destination. To make it simple, just remember for SSIS 2016 the code is "5", SSIS 2014 the code is "4", SSIS 2012 the code is "3"... 


        static void Main(string[] args)
        {

            Application app = new Application();

            Package pkg = new Package();

            string pkgPath = @"d:\test\myFirstPackage.dtsx";
            string fltFilePath = @"d:\test\text.txt";
                        

            //file connection manager
            ConnectionManager fltFileConMgr = pkg.Connections.Add("FlatFile");
            fltFileConMgr.ConnectionString = @"d:\test\test.txt";
            fltFileConMgr.Name = "my File Connection Manager";

            fltFileConMgr.Properties["Format"].SetValue(fltFileConMgr, "Delimited");
            fltFileConMgr.Properties["ColumnNamesInFirstDataRow"].SetValue(fltFileConMgr, Convert.ToBoolean(true));

            //build the flat file connection in the connection manager
            RunTimeWrapper.IDTSConnectionManagerFlatFile100 fltFileCon = (RunTimeWrapper.IDTSConnectionManagerFlatFile100)fltFileConMgr.InnerObject;
            fltFileCon.CodePage = 1252;

            //for the native flat file connection manager, create import columns
            //in this example, we hard code metadata for all columns
            //FirstName, LastName, Suburb, State, Postcode
            #region columns

            RunTimeWrapper.IDTSConnectionManagerFlatFileColumn100 colFirstName= fltFileCon.Columns.Add();
            colFirstName.ColumnType = "Delimited";
            colFirstName.ColumnDelimiter = "|";
            colFirstName.DataType = RunTimeWrapper.DataType.DT_STR;
            colFirstName.ColumnWidth = 255;
            ((RunTimeWrapper.IDTSName100)colFirstName).Name = "FirstName";

            RunTimeWrapper.IDTSConnectionManagerFlatFileColumn100 colLastName = fltFileCon.Columns.Add();
            colLastName.ColumnType = "Delimited";
            colLastName.ColumnDelimiter = "|";
            colLastName.DataType = RunTimeWrapper.DataType.DT_STR;
            colLastName.ColumnWidth = 255;
            ((RunTimeWrapper.IDTSName100)colLastName).Name = "LastName";

            RunTimeWrapper.IDTSConnectionManagerFlatFileColumn100 colSuburb = fltFileCon.Columns.Add();
            colSuburb.ColumnType = "Delimited";
            colSuburb.ColumnDelimiter = "|";
            colSuburb.DataType = RunTimeWrapper.DataType.DT_STR;
            colSuburb.ColumnWidth = 100;
            ((RunTimeWrapper.IDTSName100)colSuburb).Name = "Suburb";

            RunTimeWrapper.IDTSConnectionManagerFlatFileColumn100 colState = fltFileCon.Columns.Add();
            colState.ColumnType = "Delimited";
            colState.ColumnDelimiter = "|";
            colState.DataType = RunTimeWrapper.DataType.DT_STR;
            colState.ColumnWidth = 3;
            ((RunTimeWrapper.IDTSName100)colState).Name = "State";


            RunTimeWrapper.IDTSConnectionManagerFlatFileColumn100 colPostcode = fltFileCon.Columns.Add();
            colPostcode.ColumnType = "Delimited";
            colPostcode.ColumnDelimiter = Environment.NewLine; //this is the last column, so the delimiter needs to be set as new line
            colPostcode.DataType = RunTimeWrapper.DataType.DT_STR;
            colPostcode.ColumnWidth = 4;
            ((RunTimeWrapper.IDTSName100)colPostcode).Name = "Postcode";

            #endregion


            //ole db connection manager
            ConnectionManager oleConMgr = pkg.Connections.Add("OLEDB");
            oleConMgr.ConnectionString = "Data Source = CHI\\SS2016;Provider=SQLNCLI11.1;Initial Catalog = Staging;Integrated Security = SSPI;";
            oleConMgr.Name = "my OLE Connection Manager";


            //data flow task
            Executable executable = pkg.Executables.Add("STOCK:PipelineTask");
            TaskHost host = (TaskHost)executable;
            host.Name = "DFT my data flow task";

            //now time to add inner object into the DFT
            MainPipe dft = (MainPipe)host.InnerObject;
            

            IDTSComponentMetaData100 src = dft.ComponentMetaDataCollection.New();
            src.Name = "FLT SRC";

            src.ComponentClassID = "DTSAdapter.FlatFileSource.5";
            
            CManagedComponentWrapper instanceSrc = src.Instantiate();
            instanceSrc.ProvideComponentProperties();

            
            if (src.RuntimeConnectionCollection.Count > 0)
            {
                //very important!! get the native object by the conversion
                src.RuntimeConnectionCollection[0].ConnectionManager = DtsConvert.GetExtendedInterface(fltFileConMgr);
                src.RuntimeConnectionCollection[0].ConnectionManagerID = fltFileConMgr.ID;
            }
                                    

            instanceSrc.AcquireConnections(null);
            instanceSrc.ReinitializeMetaData();
            instanceSrc.ReleaseConnections();


            //OLE Destination
            IDTSComponentMetaData100 dest = dft.ComponentMetaDataCollection.New();
            dest.Name = "OLE DEST";
            dest.ComponentClassID = "DTSAdapter.OLEDBDestination.5";

            CManagedComponentWrapper instanceDest = dest.Instantiate();
            instanceDest.ProvideComponentProperties();

            if (dest.RuntimeConnectionCollection.Count > 0)
            {
                dest.RuntimeConnectionCollection[0].ConnectionManager = DtsConvert.GetExtendedInterface(oleConMgr);
                dest.RuntimeConnectionCollection[0].ConnectionManagerID = oleConMgr.ID;
            }

            instanceDest.SetComponentProperty("OpenRowset", "Customer");


            //Path between src and dest
            IDTSPath100 path = dft.PathCollection.New();
            path.AttachPathAndPropagateNotifications(src.OutputCollection[0], dest.InputCollection[0]);

            IDTSInput100 destInput = dest.InputCollection[0];
            IDTSVirtualInput100 destVirtualInput = destInput.GetVirtualInput();
            IDTSVirtualInputColumnCollection100 destVirtualInputColumns = destVirtualInput.VirtualInputColumnCollection;

            instanceDest.AcquireConnections(null);
            instanceDest.ReinitializeMetaData();
            instanceDest.ReleaseConnections();


            //finally, map columns between input and output by name
            foreach (IDTSVirtualInputColumn100 virtualCol in destVirtualInputColumns)
            {
                IDTSInputColumn100 inputCol = instanceDest.SetUsageType(destInput.ID, destVirtualInput, virtualCol.LineageID, DTSUsageType.UT_READONLY);
                IDTSExternalMetadataColumn100 externalColumn = destInput.ExternalMetadataColumnCollection[inputCol.Name];
                instanceDest.MapInputColumn(destInput.ID, inputCol.ID, externalColumn.ID);
            }


            app.SaveToXml(pkgPath, pkg, null);

            pkg.Execute();

            Console.WriteLine("package created");
            Console.ReadLine();
        }

2016-05-16

SSIS Custom Control Flow Task - RS Execution Task

Long time ago I blogged the topic of how to create custom control flow component in SSIS.  In those posts I demonstrated how to build the control flow task by a very simple component but without any execution logic.


Recently I started to upgrade my old jobs from 2012 to 2014 version. So to demonstrate how to design the execution logic, I uploaded the source code of my report execution task onto the Github. You can access the C# project here.


The whole project was created by following the same routine I posted at part1, part2, part3, and part4. So hopefully it can give you some general ideas when you want to create your own control flow task. You do not need to follow steps listed in my posts: in a real world scenario, you can create the task by using just one class library project, simply add Winform into the project.


Feel free to modify the source code of the project if you want to adopt it in your own scenario: just follow the instruction in the readme and build the project into your SSIS task folder:


If you are using other version of SQL Server, e.g. 2008R2 or 2012, you can still use it. Because the task is built on top of ReportService2010 and ReportExecution2005 web services, you can build you own version by referencing correct Microsof.SqlServer.ManagedDTS and Microsoft.SqlServer.Dts.Design. By default installation, you should find them at the SDK folder: ...\Microsoft SQL Server\<SQL version>\SDK\Assemblies\.


Unfortunately there is no simple solution to convert the task to support SSRS2005 or SSRS2008, because they are built based on ReportingService2005/2006 web services. So to get the task fully support these two versions, you have to rebuild the web service reference and fix the conflict in the project.


One last word is, please always do the test before deploy it into your production, it is at your own risk if you decide to use it in your production environment.


2016-04-19

SSIS Case Study: Optimise the Data Process

When design a data procedure to deal with large amount of data, the white paper “We Loaded 1TB in 30 Minutes with SSIS, and So Can You” is always a good starting point to begin our design task. However, I am afraid in a real word scenario, it might be a bit difficult to get an environment set up like that: gigabytes fibre channel, independent physical servers, flat file data source without data quality issue, stable control flow/data flow without checkpoint and error handling. Well, it is simply too good to be true.

Recently we migrated all our client activities to a new dialler platform, after that I received the request to achieve/back up all business critical data from the old dialler platform to our local database server. Because of some business decisions, we could not ask for back up files directly, so we decided to use SSIS to pull all data we need from the remote site.

The old dialler system is sitting on MySQL database hosted in a remote data centre. The connection between the remote data centre and our site is a 30MB fibre connection. The data needs to be downloaded into an archive database hosted on a virtual server. We need to avoid some certain time points, as the full back up tasks could freeze IO. And additionally we need to download recording files as well.

The packages are simple, here I just want to share some lessons we learnt from the design:


Allow Errors & Propagate = False


Like common ETL framework, let the job skips the error, logs the error, and handles the error at a later stage. In our case we created tables like below: DownloadHelper to store parameters for each small packages, DownloadLog to store pre-execution information and post-execution information, and ErrorLog to store actual exceptions. So when an error occurs, we can adopt different approaches to handle the error based on its severity level.


To allow the package bypass the error, firstly bring up Variable Grid Options window, and check the option “Show system variables”.


Then go to Event Handlers tab, add an OnError event handler for selected task. In addition to log the error on the screen, the most important setting is to change variable “Propagate” from True to False. After this change, the job will continue to next step even though the task issues an error.


Simplify Data Flow


To improve the data flow process, we removed nearly all transformation components within the data flow, especially the data conversion component.

However there are differences in data types between MySQL and SQL Server. So to handle the differences, we built destination table schema by using openquery targeting remote MySQL database:

 select * into [destination] from openquery([LinkServerName], 'select * from [MySQL table] limit 1')  

Eventually most of our data flow tasks look like below screenshot:


Optimize Data Flow


Loading the data into partitions/using balanced loading approach could be a great help in many cases, but after evaluate our situation, we did not adopt this approach as we found the bandwidth is the major component to affect our data flow. And obviously, we won’t increase the bandwidth just because of archives/backup job.

So within our environment we just did below configurations:

1. For the data flow task, increase the size of DefaultBufferMaxRows and DefaultBufferSize;


2. For the data destination component, select Table or View – Fast Load, and uncheck Keep Identity, Keep Nulls, and Check Constraints, and check Table Lock option. Leave the SSIS service to determine rows per batch and maximum commit size.


After did all these settings, below are the comparison result. As you can see, the total time spent dropped a lot. Well, this result cannot compare to the case as mentioned at the beginning of this post, but within our environment it is a very acceptable result.


2015-09-18

SSIS Replace Email Addresses in Send Mail Task

Lazy Sep! 3 weeks to my holiday!!

Business is changing very quick. Couple months ago, I posted topics such as How to replace images in a SSRS report, and How to replace connection strings in a SSRS report. Now, let me show you how to replace email addresses in the Send Mail Task of the SSIS package.

The scenario is simple, my company's domain changed, so we have to change email's from, to, cc, bcc accounts in quite a lot packages. Within the SSIS package, we have two ways to send an email: by using Send Mail Task, or by calling sp_send_dbmail in Execute SQL task.

The later case is simple, as we usually store email addresses in a helper table. So simply we just need to update email addresses stored in the helper table.

The first case is what I would like to show you, so have a look:

First of the first, we need to add the references into the project. Two specific references we need to add for this task, one is ManagedDTS, and another one is the SendMailTask.


Basically the ManagedDTS gives you a global view of the package, and the SendMailTask gives you specific management capacity for the component. So for example, if you want to replace the file path within the File System Task, you need to add Microsoft.SqlServer.FileSystemTask.

Now in the using section we need to add what we just referenced

After we prepared our project, we can start to 1. load the package, 2. loop the components, 3. do some changes.

One thing needs to notice at step 2, every component can be treated as an Executable in a package scope. But the container component, i.e. For Loop, Foreach Loop, and Sequence containers can contain child executables. Therefore within my code, I need to detect object type of the executable, and then do my change email address task.

To make it simple, I just create a recursive method to loop the executable.

     public void LoopExecutables(Executable e)  
     {  
       if (e is TaskHost)  
       {          
         TaskHost th = (TaskHost)e;  
         if (th.InnerObject is Microsoft.SqlServer.Dts.Tasks.SendMailTask.SendMailTask)  
         {  
           SendMailTask smt = (SendMailTask)th.InnerObject;  
           smt.FromLine = Regex.Replace(smt.FromLine, "<old email address>", "<new email address>", RegexOptions.IgnoreCase);  
           smt.ToLine = Regex.Replace(smt.ToLine, "<old email address>", "<new email address>", RegexOptions.IgnoreCase);  
           smt.CCLine = Regex.Replace(smt.CCLine, "<old email address>", "<new email address>", RegexOptions.IgnoreCase);  
           smt.BCCLine = Regex.Replace(smt.BCCLine, "<old email address>", "<new email address>", RegexOptions.IgnoreCase);  
         }  
       }  
       else if (e is Sequence)  
       {  
         Sequence seq = (Sequence)e;  
         foreach (Executable e2 in seq.Executables)  
         {  
           LoopExecutables(e2);  
         }  
       }  
       else if (e is ForEachLoop)  
       {  
         ForEachLoop fel = (ForEachLoop)e;  
         foreach (Executable e2 in fel.Executables)  
         {  
           LoopExecutables(e2);  
         }  
       }  
       else  
       {  
         MessageBox.Show(e.GetType().FullName);  
       }  
     }  

Now remaining task becomes straightforward. We load the package, we loop the executables in the package, and finally we save the package. Below is the Main() method:


           public void Main()  
           {  
       Microsoft.SqlServer.Dts.Runtime.Application App = new Microsoft.SqlServer.Dts.Runtime.Application();  
       Package package = new Microsoft.SqlServer.Dts.Runtime.Package();  
       string PackagePath = Dts.Variables["strPackagePath"].Value.ToString();  
       string NewPackagePath = Dts.Variables["strNewPackagePath"].Value.ToString();  
       if (File.Exists(PackagePath))  
       {  
         package = App.LoadPackage(PackagePath, null);  
         try  
         {  
           foreach (var item in package.Executables)  
           {              
             LoopExecutables(item as Executable);  
           }  
           string Folder = Path.GetDirectoryName(NewPackagePath);  
           if (!Directory.Exists(Folder))  
           {  
             Directory.CreateDirectory(Folder);  
           }  
           App.SaveToXml(NewPackagePath, package, null);  
         }  
         catch (Exception ex)  
         {  
           MessageBox.Show(ex.Message);  
         }  
       }  
                Dts.TaskResult = (int)ScriptResults.Success;  
           }  

One last thing to mention, if you want to replace the variable value of the package, remember to check variable's namespace, as usually you do not want to touch system variables, like below

           foreach (var item in package.Variables)  
           {  
             Variable var = (Variable)item;  
             if (var.Namespace == "User")  
             {  
               //do something  
             }  
           }  

2015-08-05

SSIS & Salesforce - Retrieve Salesforce Entity Data by SOAP API

As advertised, Salesforce is the world No. 1 on demand CRM platform. It is quite popular nowadays, across different sizes and areas of businesses. From our clients, the platform is being used by sport utilities, government agencies, energy retailers, and computer and service retailers.

Unfortunately it still has its own problems, for example, data quality problem. Due to the openess of the Salesforce platform, it is nearly impossible to control the data quality from its own features, at least from our clients, data report generated from Salesforce is in horrible quality, definitely cannot be used for reporting/analysis purpose.

So what we could do is extracting the raw data from Salesforce, and do some cleansing task, load into SQL Server database, a standard ETL procedure. However it is difficult to find a free plugin/component you can use in your SSIS to extract Salesforce data. So what I would like to do, is to show how to retrieve the data from sales force through its API. (Keep in mind there are many ways to access Salesforce data, here is only one of them)

To begin our work, we need to have the API. Log into the Salesforce platform,  go to the Setup page, on the left hand side, under the Build - Develop list view, you should see the API option.


Click this link, a list of WSDL options should be shown on the main panel. They are for different design purpose, as described on the page. What we need is the Enterprise WSDL, as it contains the most basic types we need in this example. Right click the link "Generate Enterprise WSDL", and save the file to your local folder.


Now before go any further, a quick notification about the WSDL. The downloaded WSDL can NOT be used in the project directly. If we add the WSDL as a web service reference into the project, as shown below


When you compile and run the project, you will get error message like below

In short it is because the ListViewRecord, this complex type defined in the WSDL does not contain a data type. It is fine for some languages, because the columns "ListViewRecordColumn" contains the data type definition. But from .Net, we have to explicitly identify the data type.

So we need to manually fix this problem: Open the downloaded WSDL file, locate the node "ListViewRecord" as shown below


Under the tag </sequence>, we need to declare its data type by adding

 <xsd:attribute name="tmp" type="xsd:string" />  

Then it should look like


Now the API definition part is done. We need to collect some other information before we go to SSIS part.

To access the Salesforce API, we need to provide our login email, password, and the token. To get the token we need to go to My Setting of the Salesforce platform, on the left hand side, expand options under Personal node, you should see the option "Reset My Security Token"


By click it, on the main panel of the page, you will see the warning message

Click the button "Reset Security Token", you will see the confirmation message like below, and a system email will shot into your associated email address.

Now we have all the information we need from Salesforce side. But before we go into SSIS, a quick tip may save your time: you may want to set password never expires under a Dev environment. Otherwise every time you change your password, you need to reset your security token.


Now time to look into SSIS. What I would like to do is to use a script component to get the User data from Salesforce.

Firstly drop a data flow task onto the control flow panel.

Within in the data flow task, drag and drop a script component, and select source on the pop up window.


Double click the script component, and go to "Inputs and Outputs" tab. As you can see, I created four output columns for the default output, FirstName, LastName, Title, and Email. They will be used to hold data retrieved from the User entity in Salesforce. For them, I defined their data type as string, length as 255. (You can also see I created another output "Output_Err". Because Salesforce's API provide the login result class, it can be used to show standard or customised error messages. But it will not be covered in this post, as it could be a huge topic)


Now to use the API, we need to add the downloaded, and modified WSDL as a web service into the script project.


Now turn off serialisation assembly option as shown below. Otherwise we will see "no binary code" error in the package.


At this stage, the project configuration is down. The only remaining job is coding.

Add the name space


Then I declared a SforceService to hold the actual service.

Coding is always simple from my understanding, once we know what we need to do

Then drag a Union All component under the Script component, and add a data viewer between these two components


Execute the task, the user records are exported from Salesforce


So now you have the chance to cleanse the Salesforce data, import into SQL Server, and do your own reporting/analysis task.


Codes within the CreateNewOutputRows method:

 public override void CreateNewOutputRows()  
   {  
     string email = "<login email>";  
     string password = "<login password>";  
     string token = "<security token>";  
     Service = new SforceService();  
     LoginResult LoginResult = Service.login(email, password + token);  
     string authurl = Service.Url;  
     Service.Url = LoginResult.serverUrl;  
     Service.SessionHeaderValue = new SessionHeader();  
     Service.SessionHeaderValue.sessionId = LoginResult.sessionId;  
     string sQuery = "SELECT FirstName, LastName, Title, Email FROM User";  
     QueryResult Qr = Service.query(sQuery);  
     if (Qr.size > 0)  
     {  
       foreach (sObject o in Qr.records)  
       {  
         if (o is User)  
         {  
           User u = (User)o;  
           Output0Buffer.AddRow();  
           Output0Buffer.FirstName = u.FirstName;  
           Output0Buffer.LastName = u.LastName;  
           Output0Buffer.Title = u.Title;  
           Output0Buffer.Email = u.Email;  
         }  
       }  
     }  
   }