So today's topic is creating SSIS package via BIML. BIML, stands for Business Intelligence Markup Language, is an extremely powerful tool can help you prepare and standardize your ETL project. Just in case you haven't heard of it, you can find everything about BIML at BIMLScript site. Just like previous two posts, I am going to demonstrate how easily we can create identical package (a Data Flow Task, flat file connection, and OLE DB connection) in BIML today.
Creating BIML for SSIS package is a bit different to our previous projects, in which we did C# code in a C# console program. To create a BIML file, we do our task in Visual Studio Business Intelligence project.
So first of first, we need to have BIMLExpress installed in our development environment. Then in your Visual Studio IDE you should be able to add BIML file into your project via the menu item:

Alternatively, you can add a BIML file into the project through the context menu.

After we have BIML file added into the project, we can start to write BIML components. To save your time, here is what I wrote:
<biml xmlns="http://schemas.varigence.com/biml.xsd">

    <connections>
        <flatfileconnection fileformat="myBIMLFlatFileFormat" filepath="D:\test\test.txt" name="myBIMLFltCon"></flatfileconnection>
        <oledbconnection connectionstring="Data Source=CHI\SS2016;Initial Catalog=Staging;Provider=SQLNCLI11.1;Integrated Security=SSPI" name="myBIMLOleCon"></oledbconnection>
    </connections>

    <fileformats>
        <flatfileformat codepage="1252" columnnamesinfirstdatarow="true" flatfiletype="Delimited" headerrowdelimiter="|" isunicode="false" name="myBIMLFlatFileFormat" textqualifer="None">
            <columns>
                <column columntype="Delimited" datatype="AnsiString" delimiter="|" length="255" name="FirstName"></column>
                <column columntype="Delimited" datatype="AnsiString" delimiter="|" length="255" name="LastName"></column>
                <column columntype="Delimited" datatype="AnsiString" delimiter="|" length="100" name="Suburb"></column>
                <column columntype="Delimited" datatype="AnsiString" delimiter="|" length="3" name="State"></column>
                <column columntype="Delimited" datatype="AnsiString" delimiter="CRLF" length="4" name="Postcode"></column>
            </columns>

        </flatfileformat>
    </fileformats>

    <databases>
        <database connectionname="myBIMLOleCon" name="BIMLStaging"></database>
    </databases>

    <schemas>
        <schema databasename="BIMLStaging" name="BIMLSchema"></schema>
    </schemas>

    <tables>
        <columns>
                <column datatype="AnsiString" length="255" name="FirstName"></column>
                <column datatype="AnsiString" length="255" name="LastName"></column>
                <column datatype="AnsiString" length="100" name="Suburb"></column>
                <column datatype="AnsiString" length="3" name="State"></column>
                <column datatype="AnsiString" length="4" name="Postcode"></column>
            </columns><table name="customer" schemaname="BIMLStaging.BIMLSchema">

        </table>
</tables>


    <packages>
        <package name="myBIMLPackage" protectionlevel="EncryptSensitiveWithUserKey">
            <tasks>
                <dataflow name="myBIMLDFT">
                    <transformations>
                        <flatfilesource connectionname="myBIMLFltCon" name="myBIMLFltSrc"></flatfilesource>
                        <oledbdestination connectionname="myBIMLOleCon" name="myBIMLOLEDest">
                            <inputpath outputpathname="myBIMLFltSrc.Output"></inputpath>
                            <externaltableoutput table="customer"></externaltableoutput>
                        </oledbdestination>
                    </transformations>
                </dataflow>
            </tasks>
        </package>
    </packages>

</biml>
Once we complete the coding task, we can simply right click the BIML file, and then press "Generate SSIS Package".

Now a new package is generated in our Business Intelligence project (myBIMLPackage). Open the package and run the package, we got the execution result right away.

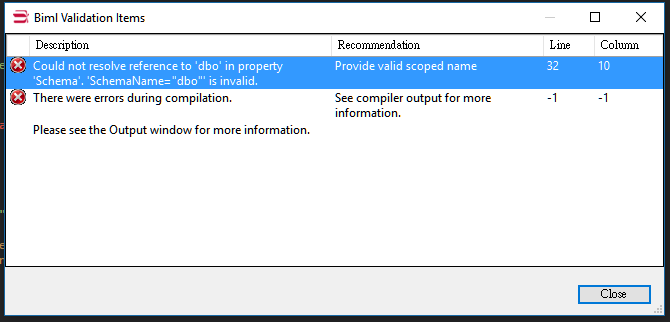
Obviously, BIML is much simpler than other approaches. It hides the complicated mapping routines for you when you are designing your package. Within the Business Intelligence project, you can add BIML script file as a standard template and then generate packages in one batch. Additionally, BIML express provides quite a lot handy functions to improve your productivity, such as BIML script validation. So I strongly recommend this approach when you are working in ETL project.
Here is the end of the series "Create SSIS package in Code". Before my next post, enjoy it. :)